
Please follow these directions on how to install shocks on a Smartop Upright Cover:
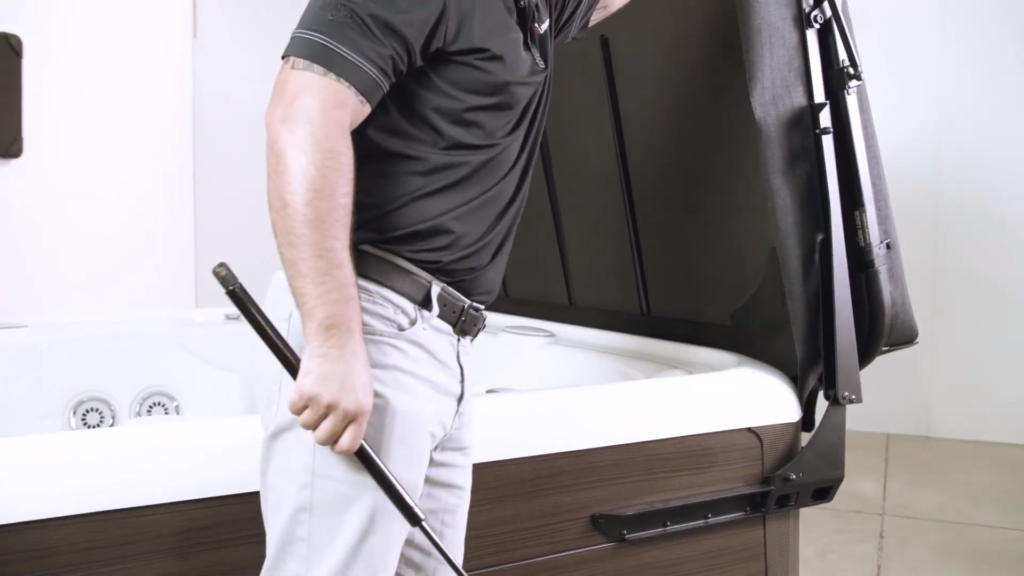
1. Prepare for Lift: Before attempting to raise the Smartop into the upright position, ensure you have a firm grip on the cover. It’s crucial to handle it securely to avoid any accidents or damage during the process.
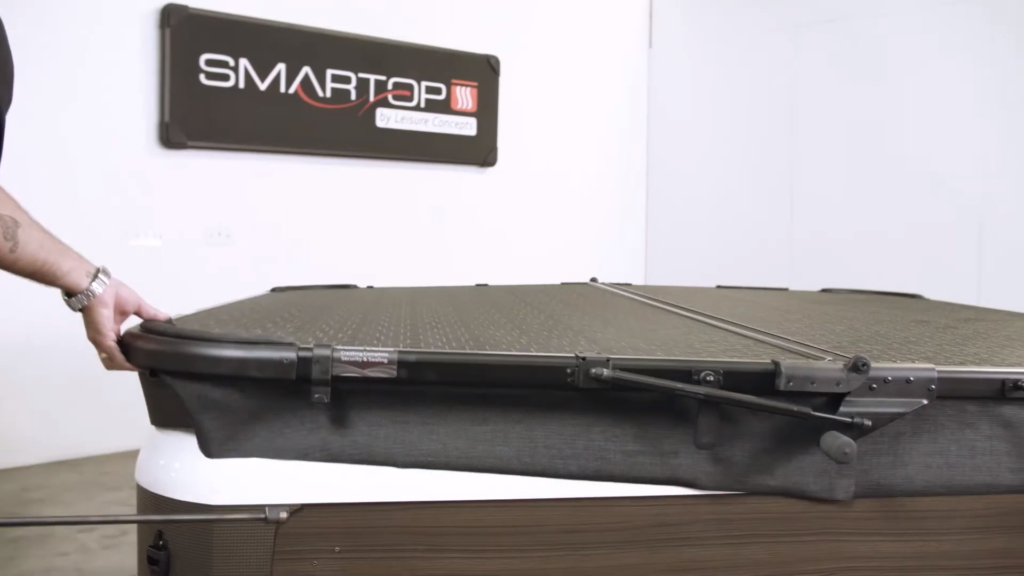
2. Locate the Shocks: The shocks are essential components for assisting in the lifting of the Smartop. They will help you raise it with ease. Ensure you have both shocks ready for attachment.
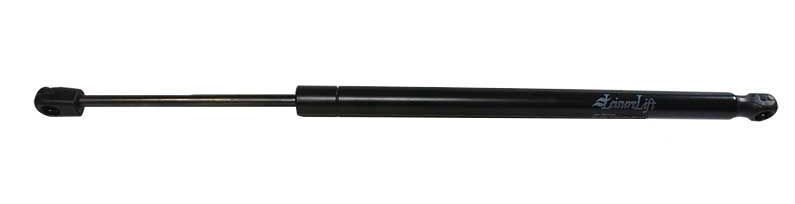
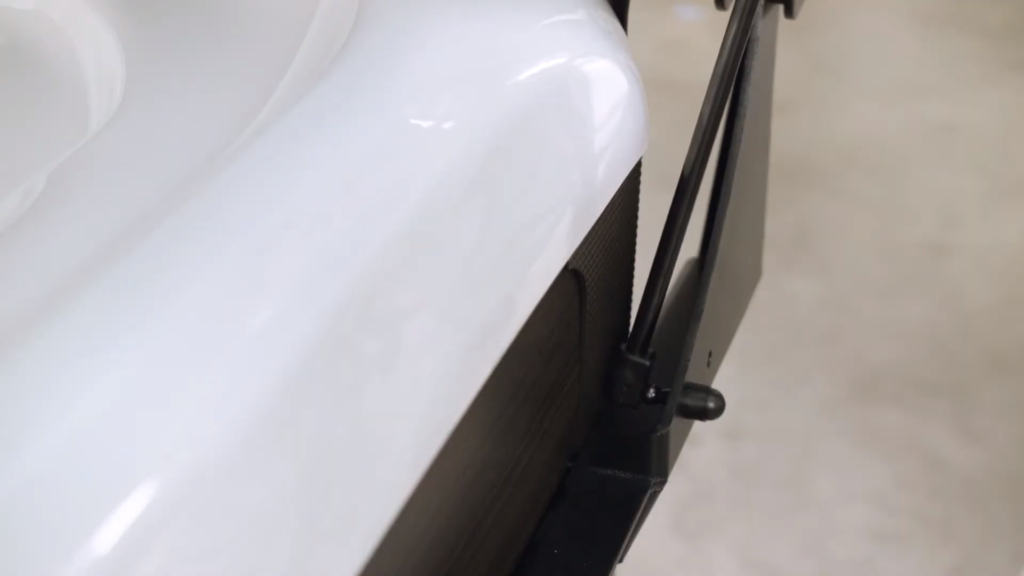
3. Proper Shock Orientation: Take a moment to inspect the shocks. You should note that there is a black body on one end of each shock. When attaching the shocks, make sure that this black body is positioned on top. This ensures proper functioning and stability when lifting the Smartop.
4. Identify Ball Stud Locations: To attach the shocks, you’ll need to connect them to ball studs. These ball studs should already be pre-installed in the holes closest to the back of the bracket. Take a moment to locate these ball studs.
5. Initial Lifting Attempt: Begin by gently attempting to lift the Smartop into the upright position.
If it doesn’t lift off the spa easily, don’t force it. Instead, follow these steps to troubleshoot:
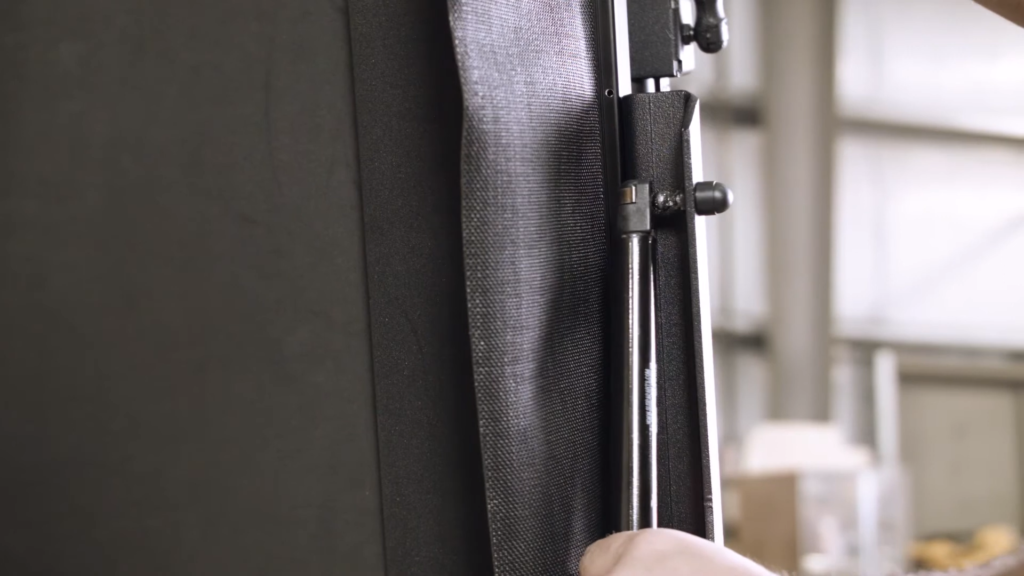
- Ball Stud Adjustment: First, inspect the ball studs on one side of the spa. If the Smartop is not lifting easily, it’s possible that the ball stud placement might need adjustment.
- Front Hole Placement: To make the Smartop easier to lift, move the ball stud on one side of the spa to the front hole on the bracket. This might provide the additional leverage needed for smooth lifting.
- Reattach the Shock: After moving the ball stud, reattach the shock to the adjusted ball stud. Ensure it is securely connected.
6. Second Lifting Attempt: Try lifting the Smartop again. If it still doesn’t lift off the spa with ease, proceed to the next step.
7. Opposite Side Ball Stud Adjustment: On the opposite side of the spa, similarly, move the ball stud to the front hole on the bracket. This will balance the lifting force and make it easier to raise the Smartop evenly.
8. Reattach the Shock Again: Just as before, attach the shock to the newly adjusted ball stud securely.
9. Final Lifting Attempt: With both ball studs now in the front holes and both shocks attached correctly, try lifting the Smartop into the upright position again. It should lift smoothly and evenly.
10. Safety Check: Once the Smartop is in the upright position, make sure it is secure and stable. Double-check the attachment of the shocks and ensure that the Smartop is correctly aligned with the spa.
By following these detailed instructions, you can safely and effectively raise the Smartop into the upright position while ensuring proper attachment of the shocks for a smooth lifting process.
Shock Sizes and Part Numbers
| Part Number | Shock Strength | Cover Size |
|---|---|---|
| 101510 | 335N | 80″ and Smaller |
| 101075 | 500N | 80″ – 84″ |
| 101388 | 600N | 84″ – 88″ |
| 101389 | 700N | 88″ – 94″ |
| 101390 | 800N | 94″ and Larger |