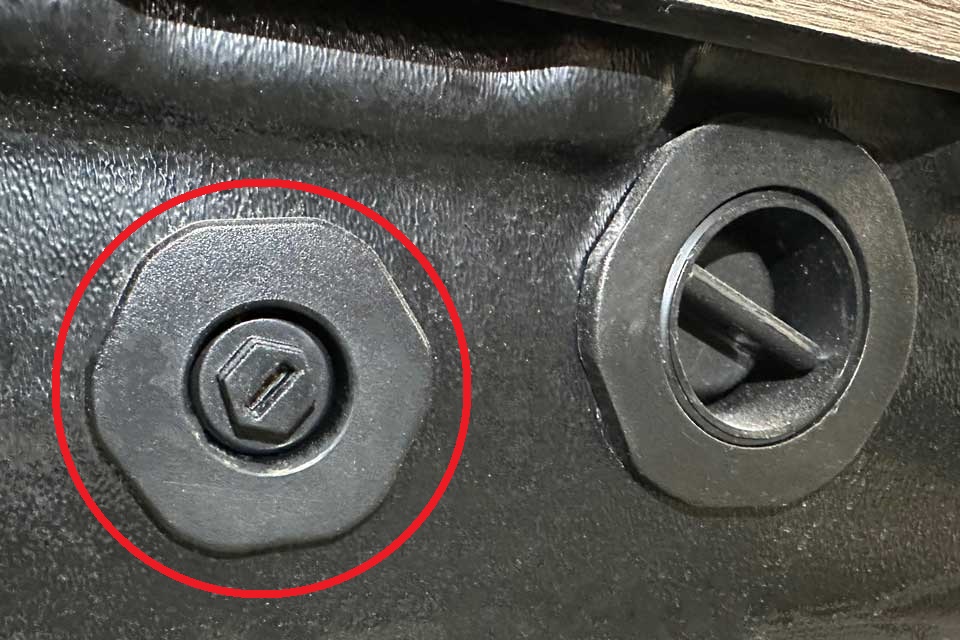
Air Bleeder Screw
These instructions should be followed at initial and subsequent draining and refilling to prevent pump cavitation caused by trapped air within the pump and plumbing system. Turning on the power to the spa before performing this priming process may make the priming process more difficult.
After filling your spa, using caution, carefully remove the air bleeder screw from the external air bleeder fitting with a standard screwdriver or ½” socket to unscrew it in a counterclockwise rotation.

Air Bleeder Screw / O-Ring Note: To prevent losing the bleeder screw and O-ring, grasp the screw while unthreading. Once removed, air and water will begin to escape through the opening.
Allow water to flow freely from the external air bleeder fitting for approximately 60 seconds. Note: Use a wet/dry vacuum or tray to catch escaping water for spa installations located indoors.
After 60 seconds, reinstall the bleeder screw and O-ring. First, by hand and then by using a standard screwdriver until snug. Do not over-tighten.
Turn on the power to the spa and turn on one pump at a time starting with pump 1, ensuring that each pump is properly primed. If you discover a pump is not moving water properly after 30-60 seconds, turn off the power to the spa and repeat instructions above.
Note: Spa equipment with circulation pumps are not as noticeable when operating correctly; for this reason, you will need to watch the control panel closely for approximately 60 seconds or until the display reads “Heating to 99°F (37°C)” (or Heating to 104°F / 40°C). If the panel displays ERROR NO FLO, turn off the power to the spa and repeat steps above.
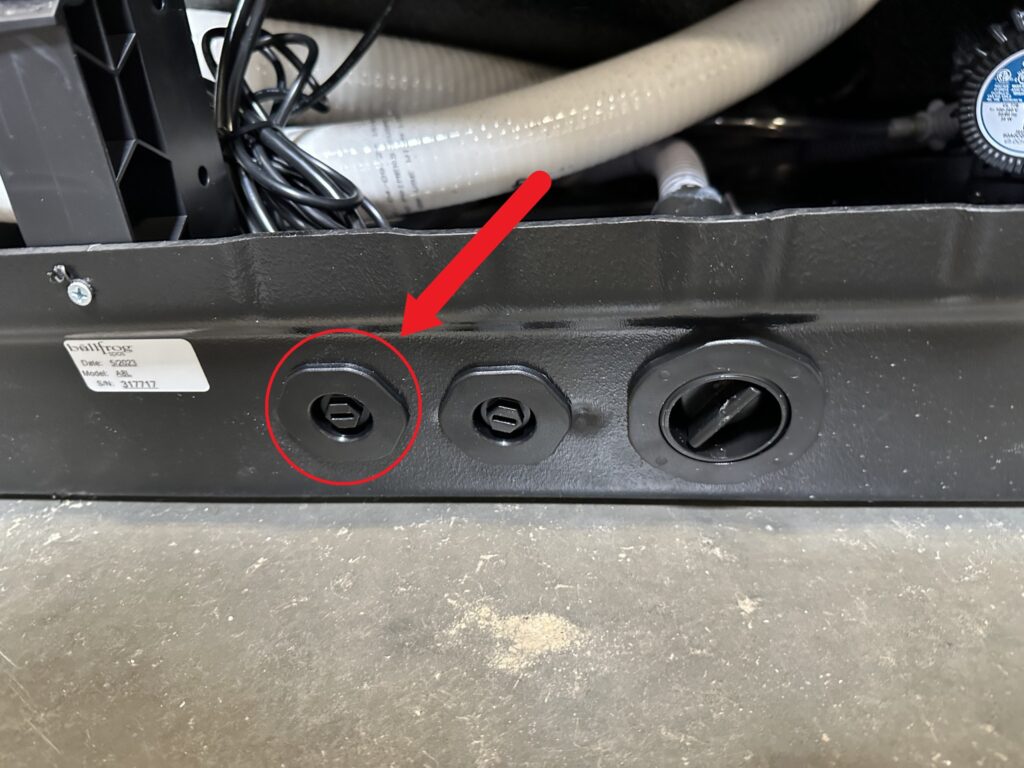
Water Feature Air Bleeder Screw
In several spa lines and models, there is a dedicated water feature pump. This technology allows the ability to create a consistent and electronically actuated push-button water feature experience. However, as with all spa pumps, this dedicated water feature pump may occasionally experience an airlock situation at startup.
To provide a more convenient startup experience, without equipment door removal, there is an added an external air bleeder valve on the spa base that is specific to the feature pump. This is a complement to the air bleeder valve already in place to service the jet pumps. All spa models that include a dedicated feature pump will have two visible bleeder valves. The valve for the feature pump will be positioned on the far left.

The air bleeder valve is simple to operate. Using a flathead screwdriver or appropriately sized socket, simply back the nut out of the fitting until both water and air begin to escape. Allow water to escape until you see a steady stream of water only with no air. When the stream is steady simply replace the nut and proceed to the normal pump startup procedure.
Please note: make sure these is enough water in the spa before attempting to bleed an airlocked pump.
